How to Set Up a Home Mining Rig
By Jason Miller – Crypto Writer 10.expert 🧠 Covering Bitcoin, altcoins, blockchain & Web3.
As a crypto writer and analyst based in the U.S., I’ve guided many enthusiasts through the exciting, yet often complex, journey of setting up a home mining rig. While professional mining farms operate on an industrial scale, building your own rig at home offers a unique blend of technical challenge, personal satisfaction, and the potential to earn cryptocurrency directly.
In 2025, home mining typically falls into two main categories: GPU mining for specific altcoins (especially those resistant to ASICs, or where ASICs are still niche/expensive) or the smaller, more accessible ASIC miners designed for home use (like Goldshell’s “BOX” series or specialized Bitcoin heaters). The principles of setting up a rig, however, remain largely consistent. It’s about combining hardware, software, and a suitable environment to efficiently convert electricity into digital assets.
Let’s break down how to set up a home mining rig, ensuring you’re prepared for the challenges and optimized for success.
How to Set Up a Home Mining Rig: From Components to Crypto Earnings 🛠️💡
Building a home mining rig is a rewarding project that requires careful planning and execution. Here’s a comprehensive guide to get your operation up and running.
Define Your Mining Goal: GPU vs. ASIC 🎯
Before buying anything, decide what you want to mine:
* GPU Mining: Best for many altcoins (e.g., Kaspa, Ravencoin, Ergo, Flux) or newer coins with ASIC-resistant algorithms. Offers more flexibility and better resale value. You’ll build a “PC-like” rig with multiple graphics cards.
* ASIC Mining: Purpose-built machines for specific algorithms (e.g., Bitcoin, Litecoin, Dogecoin, some Kaspa models). Higher upfront cost but significantly more efficient for their target coin. Setup is usually simpler, but environmental management is more intense.
Choose Your Components (GPU Rig Focus) 💻
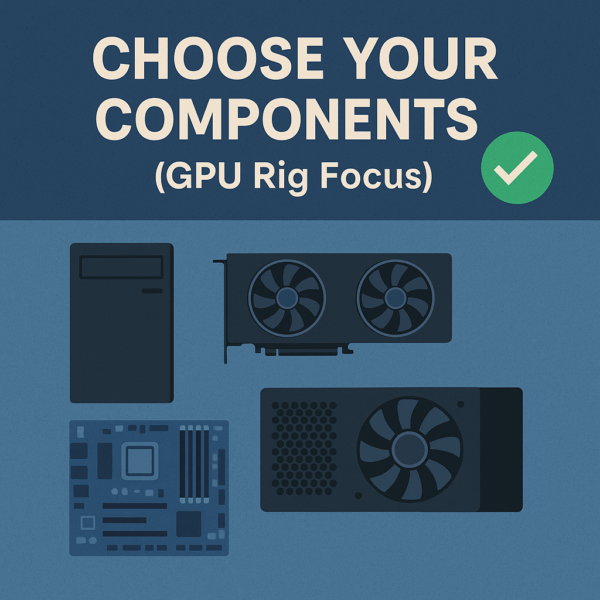
For a GPU mining rig, you’ll need:
* Graphics Cards (GPUs): The heart of your rig. Buy as many as your budget and power supply allow. Nvidia RTX 30-series/40-series or AMD RX 6000-series/7000-series are popular choices. Prioritize good hashrate-to-power efficiency.
* Motherboard: Must have enough PCIe slots (x1 or x16) to accommodate all your GPUs. Mining-specific motherboards are ideal.
* CPU: A basic, low-power CPU (e.g., Intel Celeron/Pentium, AMD Athlon) is sufficient; the CPU does minimal work in GPU mining.
* RAM: 4GB-8GB DDR4 RAM is generally enough for a dedicated mining rig.
* Power Supply Unit (PSU): Crucial! Needs enough wattage to power all GPUs and components, with at least 20-25% headroom. Look for 80+ Gold or Platinum efficiency ratings. You might need multiple PSUs for many GPUs.
* Storage (SSD/USB): A small 60-120GB SSD or even a durable USB 3.0 stick for your operating system and mining software.
* PCIe Risers: Connect your GPUs to the motherboard’s PCIe slots, allowing for spaced-out GPU placement in a frame.
* Mining Frame: An open-air frame (aluminum or steel) to mount all components and ensure good airflow. Avoid wooden frames due to fire risk.
Prepare Your Mining Environment: Location is Key 🏠
- Ventilation: Mining rigs generate significant heat. A garage, basement, or dedicated shed with good airflow and an exhaust system is ideal. Avoid small, enclosed spaces.
- Power Outlets: Ensure you have access to sufficient and stable electrical outlets. Most powerful rigs will require 240V circuits (common in North America for large appliances) and potentially dedicated breakers. Never overload standard household circuits.
- Noise: Mining rigs are loud. Consider soundproofing solutions (enclosures, sound-dampening foam) if the rig is near living areas.
- Internet: A stable, wired Ethernet connection is highly recommended. Wi-Fi can be unstable and lead to downtime.
Assemble the Hardware: Step-by-Step Build 🛠️
- Mount Motherboard: Secure the motherboard to the mining frame using standoffs.
- Install CPU & RAM: Install the CPU into its socket, apply thermal paste, and attach the CPU cooler. Insert the RAM sticks into the motherboard slots.
- Install PSU(s): Mount the power supply(s) to the frame.
- Connect GPUs via Risers: Insert PCIe risers into the motherboard’s PCIe slots. Attach each GPU to a riser card and secure the GPU to the mining frame.
- Wire Everything: Connect all power cables from the PSU(s) to the motherboard, CPU, GPUs (each GPU needs multiple PCIe power cables), and risers. Connect data cables for storage. Double-check all connections.
Install the Operating System 🖥️
- Dedicated Mining OS: Recommended for ease of use and optimization. Popular choices include:
- HiveOS: Linux-based, robust, remote management, supports various coins/miners.
- Minerstat OS: Another popular Linux-based option with similar features.
- Linux (Ubuntu/ethOS): For experienced users who prefer more control.
- Windows: Less efficient for mining due to overhead, but easier for beginners who are already familiar with it.
- Flash your chosen OS onto your SSD or USB drive.
Install Mining Software (if not using a Mining OS) 💻
If you’re using a standard OS like Windows or Ubuntu, you’ll need specific mining software:
* GPU Miners: GMiner, T-Rex Miner (Nvidia), TeamRedMiner (AMD), LolMiner.
* ASIC Miners: Most ASICs have built-in web interfaces for configuration, no separate software needed.
* Download from official sources to avoid malware.
Set Up Your Cryptocurrency Wallet 💼
Create a secure wallet for the cryptocurrency you plan to mine. This is where your earnings will be sent.
* Hardware Wallets: Most secure for long-term storage (Ledger, Trezor).
* Software Wallets: Reputable desktop or mobile wallets (e.g., Exodus, Electrum).
* Exchange Wallets: Convenient for selling, but less secure for holding large amounts.
* Never mine directly to an exchange wallet unless explicitly allowed by the exchange and you understand the risks.
Join a Mining Pool 🤝
For most home miners, solo mining is like winning the lottery. Joining a mining pool dramatically increases your chances of consistent payouts.
* Choose a Pool: Select a reputable pool for your chosen cryptocurrency (e.g., F2Pool, ViaBTC, 2Miners, WoolyPooly). Consider fees, payout thresholds, and server locations.
* Configure Pool Settings: In your mining software or ASIC’s web interface, enter the pool URL, your worker name, and your wallet address. Add backup pools if possible.
Configure & Optimize Your Miner Settings ⚙️
- Overclocking/Undervolting (GPUs): Crucial for efficiency. Use tools like MSI Afterburner (Windows) or settings within HiveOS to adjust core clock, memory clock, and power limit. Prioritize undervolting to reduce power consumption.
- Power Modes (ASICs): Many ASICs have “normal,” “low power,” or “efficiency” modes. Experiment to find the best balance for your electricity cost.
- Fan Curves: Adjust fan speeds to maintain optimal temperatures without excessive noise.
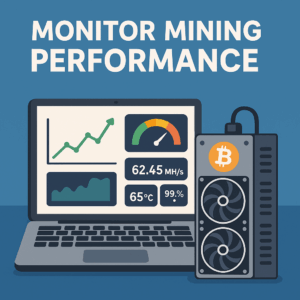
Start Mining and Monitor Performance 📈
- Launch Software: Start your mining software or power on your configured ASIC.
- Monitor: Check your miner’s dashboard (via web interface or mining OS) for hashrate, temperature, and fan speeds. Check your mining pool’s dashboard to confirm your miner is sending valid shares and your hashrate is registering.
- Troubleshoot: Be prepared for trial and error. Common issues include power supply instability, driver conflicts, or incorrect pool settings.
Implement Proper Heat Management 🔥
- Airflow: Ensure unimpeded airflow to and from your GPUs/ASICs.
- Exhaust: Use exhaust fans to remove hot air from the mining area.
- Intake: Bring in cool, fresh air.
- Temperature Monitoring: Keep an eye on component temperatures to prevent damage and ensure longevity.
Manage Noise Levels 🔇
- Dedicated Space: The easiest solution is to place the rig in a remote area (garage, basement, soundproofed closet).
- Enclosures: Build or buy sound-dampening enclosures. Ensure these still allow for adequate ventilation.
- Hydro-cooling: An advanced and expensive option for high-end ASICs to virtually eliminate fan noise.
Regular Maintenance and Updates 🧹
- Cleaning: Periodically clean dust from fans, heatsinks, and components using compressed air.
- Software/Firmware Updates: Keep your mining software, GPU drivers, and ASIC firmware updated for performance improvements and security.
- Check Cables: Ensure all power and data cables are securely connected.
Monitor Profitability Religiously 📊
Use online mining calculators daily. Cryptocurrency prices, network difficulty, and even your electricity rate can change. Be ready to adapt your strategy or even switch coins if profitability drops too low.
Safety First: Electrical and Fire Precautions 🚨
- Dedicated Circuits: Use them if possible.
- Proper Wiring: Ensure all wiring is rated for the load.
- Surge Protectors: Use high-quality surge protectors for your entire setup.
- Fire Extinguisher: Have a fire extinguisher suitable for electrical fires (Class C) nearby.
- Don’t Overload: Never overload electrical outlets or extension cords.
Setting up a home mining rig is a journey of continuous learning and optimization. By focusing on smart hardware choices, meticulous setup, and vigilant monitoring, you can create a reliable system that contributes to decentralized networks while potentially generating a passive income.


