How to Send Crypto Safely (Step-by-Step)
By Jason Miller – Crypto Writer 10.expert 🧠 Covering Bitcoin, altcoins, blockchain & Web3.
As a crypto writer and analyst, one of the most common actions you’ll take in the decentralized world is sending crypto from one wallet or exchange to another. While seemingly straightforward, this is also where many costly and irreversible mistakes can occur. Unlike traditional banking, there’s no “undo” button or central authority to reverse a transaction if you send funds to the wrong address or on the wrong network.
In 2025, with more blockchains, Layer 2 solutions, and token standards than ever before, the complexity of sending crypto has increased. However, by adopting a meticulous, step-by-step approach and understanding the underlying principles, you can execute crypto transfers with confidence and minimize risk. This isn’t just about moving tokens; it’s about mastering a fundamental skill in your crypto journey.
Let’s dive into how to send crypto safely, step-by-step, like a seasoned pro.
How to Send Crypto Safely (Step-by-Step): Your Guide to Secure Transfers 🚀🔐
Sending crypto can be nerve-wracking, but with these careful steps, you can ensure your funds reach their destination safely every time.
Understand the “Send” Process: What’s Happening? 💡
- Not Physical Movement: You’re not “sending” a physical coin. You’re broadcasting a signed message to the blockchain network, authorizing a change in ownership of a specific amount of crypto from your address to the recipient’s address.
- Irreversible: Once confirmed on the blockchain, this transaction is final.
Choose the Right Platform: Exchange or Self-Custody Wallet? 📱💻
- Centralized Exchange (CEX): (e.g., Coinbase, Binance, Kraken)
- Pros: Often simpler UI, integrated address books, sometimes lower fees for internal transfers.
- Cons: You don’t control the private keys, potentially slower withdrawals during peak times, exchange risk.
- Self-Custody Wallet (Non-Custodial): (e.g., MetaMask, Ledger, Trezor, Trust Wallet)
- Pros: You control your private keys (true ownership), direct interaction with blockchain.
- Cons: Full responsibility for accuracy, typically higher network fees (gas).
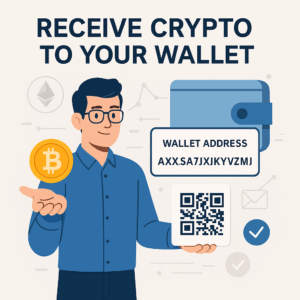
Obtain the Recipient’s EXACT Wallet Address 🎯
- The Destination: This is the most critical piece of information. A crypto address is a long string of alphanumeric characters (e.g.,
0x742d35Cc6634C0539F35C664C2Ebf61AFe658bAffor Ethereum). - Copy-Paste is King: Always, always, ALWAYS copy and paste the recipient’s address. Never type it manually.
- QR Codes: If available, scan the QR code for the address using your wallet’s built-in scanner. This is highly accurate.
- Verify with Recipient: Before sending, especially large amounts, verify the address verbally or via a secondary communication channel (e.g., call them, text them) with the recipient. Don’t rely on email or a single chat message if you suspect compromise.
Crucial: Confirm the Correct Network! 🔗
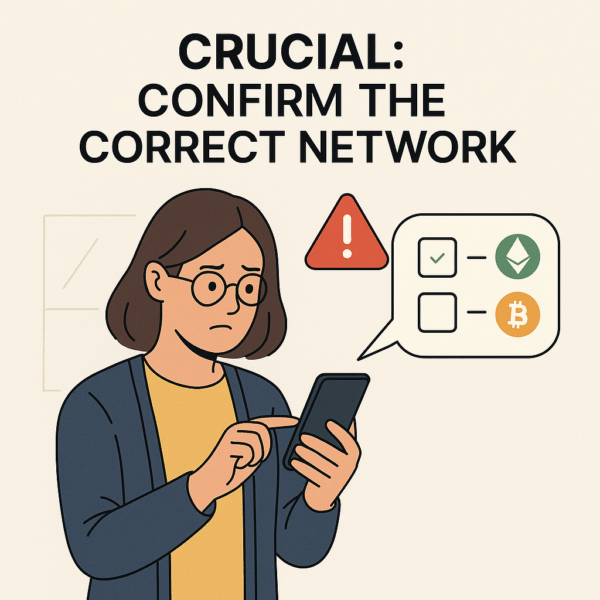
- The Biggest Mistake: Sending crypto on the wrong network is the #1 reason for lost funds.
- Example: If you’re sending USDT, is it ERC-20 (Ethereum network), BEP-20 (BNB Smart Chain), TRC-20 (Tron network), or SPL (Solana network)?
- Match Networks: The sending wallet/exchange and the receiving wallet/exchange/address MUST support and be set to the exact same network for that specific coin.
- Double-Check: Ask the recipient: “Is this an ERC-20 address?” or “Are you expecting this on BNB Smart Chain (BEP-20)?”
Specify the Amount to Send 💲
- Accuracy: Enter the precise amount of crypto you wish to send.
- “Max” vs. Custom: Be careful when using the “Max” button, especially in self-custody wallets, as it might try to send your entire balance, potentially leaving no native currency for gas fees on some chains.
Account for Transaction Fees (Gas) ⛽
- Network Costs: All blockchain transactions incur a fee, commonly known as “gas” on Ethereum and EVM chains. This fee is paid to the network validators/miners.
- Native Currency: Gas fees are typically paid in the native currency of the blockchain (e.g., ETH for Ethereum, BNB for BNB Smart Chain, SOL for Solana). Ensure you have enough of the native currency in your wallet to cover the fee.
- Dynamic Fees: Gas fees can fluctuate based on network congestion. Your wallet will usually suggest a default, but you might be able to adjust it for faster (more expensive) or slower (cheaper) confirmation times.
Perform a Small Test Transaction (For Larger Amounts) 🧪
- The “Penny Test”: If you’re sending a significant amount of crypto for the first time to a new address or platform, ALWAYS send a small, nominal amount first (e.g., $1-$5 equivalent).
- Confirm Success: Wait for this small transaction to be confirmed and appear in the recipient’s wallet before sending the full amount. This verifies the address and network are correct.
Review All Transaction Details THOROUGHLY 👀
- The Final Check: Before hitting “Confirm” or “Send,” meticulously review every detail presented:
- Recipient Address: Is it exactly correct? (Copy-paste it into a text editor and compare character by character if unsure).
- Amount: Is it the correct amount?
- Network: Is the network correct (e.g., ERC-20, BEP-20)?
- Fees: Are you comfortable with the transaction fee?
- Total: What is the total amount, including fees, that will leave your wallet?
Confirm and Broadcast the Transaction ✅
- One-Way Street: Once you’ve reviewed everything and are 100% confident, click “Confirm” or “Send.”
- Signature: For self-custody wallets, you’ll need to sign the transaction, usually by entering your password, PIN, or confirming on a hardware wallet.
Monitor the Transaction Status ⏱️
- Transaction ID (TxID/Hash): Your wallet or exchange will provide a Transaction ID (also called a transaction hash or TxID). Copy this.
- Blockchain Explorer: Paste the TxID into the relevant blockchain explorer (e.g., Etherscan for Ethereum, BscScan for BNB Smart Chain, Solscan for Solana) to monitor its progress.
- Confirmations: Wait for a sufficient number of confirmations (varies by blockchain and recipient’s requirements) for the transaction to be considered final.
Notify the Recipient (If Applicable) 🗣️
- Proof of Send: Once the transaction is confirmed, you can send the recipient the TxID as proof of the transfer.
Enable Withdrawal Whitelists (on CEXs) 📑
- Enhanced Security: Many centralized exchanges allow you to “whitelist” trusted withdrawal addresses. Once an address is whitelisted, you can only send crypto to those pre-approved addresses. This prevents a hacker from diverting funds to their own address if your exchange account is compromised.
Beware of Address Poisoning Attacks 🧪😈
- Zero-Value Transactions: Scammers may send you tiny, zero-value transactions from an address that looks almost identical to one you’ve previously interacted with (e.g., your own exchange deposit address or a frequent contact).
- Copy-Paste Confusion: The goal is that you might accidentally copy this “poisoned” address from your transaction history for a future send, mistaking it for the legitimate one.
- Verify First & Last Characters: Always verify the first 4-5 and last 4-5 characters of the address, but ideally, use the test transaction method and/or whitelisting.
Avoid Public Wi-Fi for Transactions 📶
- Security Risk: Public Wi-Fi networks are often unencrypted and vulnerable to snooping, making them risky for sensitive crypto transactions. Use a secure, private network or a VPN.
Stay Calm and Don’t Rush 🧘
- Patience Pays: Rushing is the enemy of crypto safety. Take your time, double-check everything, and if you feel stressed or rushed, step away and come back later.
- Final Thoughts: Crypto transactions are irreversible. A few extra minutes of verification can save you from irreversible losses. Practice these steps until they become second nature.
By diligently following this step-by-step guide, you’ll significantly reduce the risks associated with sending crypto and become a more confident and secure participant in the decentralized economy.

)
&description=&image=https://10.expert/wp-content/uploads/2025/06/How-to-Send-Crypto-Safely-Step-by-Step.png)