How to Set Up a MetaMask Wallet
By Jason Miller – Crypto Writer 10.expert 🧠 Covering Bitcoin, altcoins, blockchain & Web3.
As a crypto writer and analyst, MetaMask has become the undisputed standard for interacting with the Ethereum blockchain and a vast ecosystem of EVM-compatible networks. It’s more than just a wallet; it’s your browser-based gateway to decentralized applications (dApps), DeFi protocols, NFT marketplaces, and Web3 gaming. If you’re serious about exploring the world beyond centralized exchanges, setting up MetaMask is an essential first step.
In 2025, MetaMask continues to evolve, with planned native support for non-EVM chains like Bitcoin and Solana on its roadmap, further cementing its position as a multi-chain super-wallet. Its robust security features and user-friendly interface make it an excellent choice for both beginners and experienced users. However, the power and flexibility of MetaMask also come with significant responsibility regarding your private keys and security.
Let’s dive into how to set up a MetaMask wallet like a pro, ensuring a secure and smooth entry into the decentralized web.
How to Set Up a MetaMask Wallet: Your Essential Gateway to Web3 🦊🌐
MetaMask is your key to interacting with the decentralized web. Here’s a step-by-step guide to setting it up securely and efficiently.
Download the Official MetaMask Extension/App 📥
- Crucial First Step: Always download MetaMask directly from the official website:
metamask.io. - Browser Extension: For desktop users, it’s typically a browser extension for Chrome, Firefox, Brave, or Edge.
- Mobile App: For smartphone users, download the official app from the Apple App Store or Google Play Store. Be extremely vigilant against fake apps – check the developer (ConsenSys) and download numbers.
Install and Launch MetaMask 🚀
- Browser: Once downloaded, your browser will typically guide you through the installation process. You’ll then see the MetaMask fox icon appear in your browser’s toolbar.
- Mobile: Open the downloaded app.
- Pin for Easy Access: In your browser, pin the MetaMask extension to your toolbar for quick access.
Initiate Wallet Creation 🆕
- “Get Started”: Click on the MetaMask icon and select “Get Started.”
- “Create a new wallet”: If this is your first time using MetaMask, choose “Create a new wallet.” (If you already have a seed phrase from another wallet, you’d choose “Import wallet.”)
- Opt-in/Opt-out of Data Usage: MetaMask will ask if you’d like to opt-in to anonymous data collection to help improve the product. This is your choice and does not affect wallet functionality.
Create a Strong Password 🔑
- Local Security: This password protects your MetaMask wallet on that specific device. It encrypts your private keys locally.
- Strength is Key: Choose a long, complex, and unique password (mix of upper/lowercase letters, numbers, symbols). Do not reuse passwords.
- Important Note: This password is not your seed phrase. Losing this password doesn’t mean you lose your crypto if you have your seed phrase, but it means you can’t access your wallet on that device until you re-import it using your seed phrase.
Secure Your Secret Recovery Phrase (Seed Phrase) – THE MOST CRITICAL STEP! 🤫📝
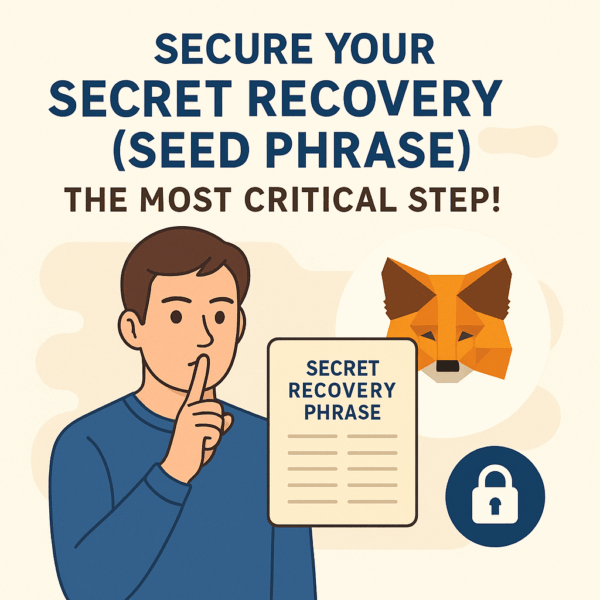
- What it is: MetaMask will display a 12-word “Secret Recovery Phrase” (formerly called “Seed Phrase”). This is the master key to your entire wallet and all accounts within it.
- Write It Down (Physically): Immediately write down these 12 words on a piece of paper, exactly as they appear, in the correct order. Do this multiple times.
- Offline Storage: Store these physical copies in secure, separate, and secret locations (e.g., a fireproof safe, a safety deposit box, a trusted friend’s secure location).
- NEVER Digital: DO NOT store your seed phrase digitally (e.g., on your computer, phone, cloud, email, screenshot). This makes it vulnerable to hacks.
- Never Share: Never, ever share your seed phrase with anyone, even if they claim to be MetaMask support or a trusted entity. Anyone who asks for it is a scammer.
Confirm Your Secret Recovery Phrase ✅
- Verification: MetaMask will ask you to re-enter a few words from your phrase to confirm you’ve written it down correctly. This is a crucial check.
- Don’t Rush: Take your time with this step. Accuracy is paramount.
Understand Your Wallet Interface UI
- Account Address: Your public wallet address (starts with
0x...) is displayed at the top. This is what you share to receive crypto. - Network Selector: Defaults to “Ethereum Mainnet.” Click it to see other networks or add new ones.
- Assets Tab: Shows your token balances.
- Activity Tab: Displays your transaction history.
- Send/Receive/Swap Buttons: For core wallet functions.
Add Funds to Your Wallet 💸
- “Buy”: MetaMask offers integrated services (e.g., via Wyre, Transak, MoonPay) to buy ETH or other tokens directly with a debit/credit card or bank transfer.
- “Receive”: Click “Receive” to display your wallet address (and a QR code). You can then send crypto to this address from an exchange or another wallet.
- “Direct Transfer from CEX”: Copy your MetaMask address and paste it into the “send” or “withdraw” field on your centralized exchange account.
Connect to Decentralized Applications (dApps) 🔗
- “Connect Wallet”: When you visit a dApp (e.g., Uniswap, OpenSea, Aave), look for a “Connect Wallet” button (often in the top right).
- MetaMask Pop-up: A MetaMask pop-up will appear, asking you to confirm the connection and select which account you want to connect.
- Review Permissions: Always review the permissions a dApp requests. Be cautious about granting excessive permissions, especially “setApprovalForAll” or unlimited token spending.
Add Custom Tokens (If Not Auto-Detected) ➕
- Import Tokens: If a token doesn’t automatically appear in your “Assets” tab after receiving it, you’ll need to “Import Tokens.”
- Contract Address: You’ll need the token’s contract address (find this on CoinGecko, CoinMarketCap, or a blockchain explorer like Etherscan).
- Custom Token Details: Enter the contract address; the token symbol and decimal precision should auto-fill.
Add Custom Networks (EVM-Compatible Chains) 🌐
- Beyond Ethereum: MetaMask natively supports Ethereum. For other EVM-compatible chains (e.g., Polygon, BNB Smart Chain, Avalanche, Arbitrum, Optimism), you’ll need to add them manually or via Chainlist.
- Manual Addition: Go to “Settings” > “Networks” > “Add Network.” You’ll need the Network Name, RPC URL, Chain ID, Currency Symbol, and Block Explorer URL for the specific network. (Find these on the network’s official documentation or Chainlist.org).
- Chainlist.org: A simpler way is to visit
chainlist.org, connect your MetaMask, search for the network, and click “Add to MetaMask.”
Adjust Gas Fees for Transactions ⛽
- “Edit Gas” (Advanced Options): Before confirming a transaction, you can often “Edit Gas” to adjust the gas price (Gwei) and gas limit.
- Faster/Slower/Cheaper: Higher Gwei means faster confirmation, lower Gwei means slower but cheaper. Use a Gas Tracker (e.g., Etherscan Gas Tracker) to gauge optimal fees.
- Smart Transactions (2025): MetaMask’s 2025 roadmap includes “smart transactions” that aim to abstract away gas complexities and even allow gas payments in other tokens, improving UX significantly.
Connect with a Hardware Wallet (Advanced Security) 🔒
- Best Practice: For larger crypto holdings, connect your MetaMask to a hardware wallet (like Ledger or Trezor).
- Enhanced Security: Your private keys remain on the hardware device, never exposed to your computer or the internet, even when signing transactions via MetaMask. This is the gold standard for security.
Manage Multiple Accounts 👯
- “Create Account”: Within MetaMask, you can create multiple “accounts” (distinct addresses) under a single seed phrase. This is useful for organizing funds or isolating activity.
- Import Account: You can also import existing private keys (not recommended unless you know what you’re doing) or connect a hardware wallet as a new account.
Implement Security Best Practices Religiously 🛡️
- Phishing Detection: Ensure MetaMask’s built-in phishing detection is enabled (
Settings > Security & Privacy). - Auto-Lock Timer: Set a short auto-lock timer (
Settings > Advanced) to automatically lock your wallet after inactivity. - Review Permissions: Regularly check and revoke unnecessary token approvals on sites like
revoke.cashor Etherscan’s “Token Approvals” tab. - Stay Skeptical: Never click suspicious links. Never respond to unsolicited DMs claiming to be support. Assume everything is a scam until proven otherwise.
Setting up MetaMask is your initiation into the vast and innovative world of Web3. By following these steps and prioritizing security, you’ll be well-equipped to explore the decentralized frontier with confidence.
